
A Comprehensive Guide to 12V Adjustable Voltage Regulators

Hedy · Dasenic Content Editor
Published Apr 25,2024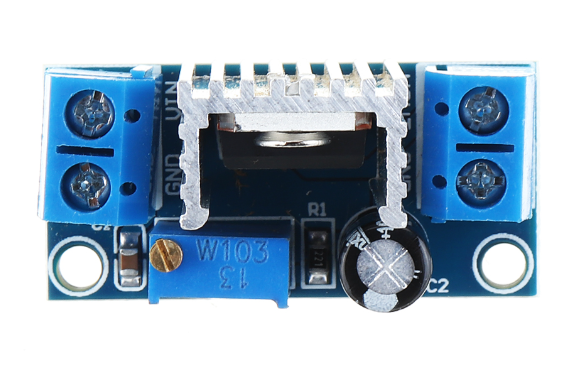
What Is a 12V Adjustable Voltage Regulator?
A 12V adjustable voltage regulator provides a stable and adjustable output voltage of 12 volts, regardless of input fluctuations or load changes. Its adjustable feature allows for precise voltage control within a certain range, making it versatile for different applications.
One common type is the LM317, capable of delivering up to 1.5 amps. It continuously adjusts internal resistance to maintain a constant output voltage, suitable for low to medium power applications.
To adjust the output voltage, external resistors are used. These regulators are widely used in battery chargers, power supplies, LED drivers, and audio amplifiers, where stable and adjustable voltage is crucial for sensitive electronic components.
How Does a 12V Adjustable Voltage Regulator Work?
A 12V adjustable voltage regulator, like the LM317, operates based on the principle of regulating voltage through feedback control. Here's how it works:
Reference Voltage: The heart of the adjustable voltage regulator is a reference voltage. In the case of the LM317, this is typically 1.25 volts between the output pin (Vout) and the adjustment pin (Adj).
Adjustment Pin: The adjustment pin (Adj) is connected to an external resistor network that sets the desired output voltage. By adjusting the resistance between the adjustment pin and the output pin, the output voltage can be varied.
Feedback Control: The regulator compares the output voltage (Vout) with the reference voltage (1.25V). If the output voltage drops below 1.25 volts, the regulator increases the output voltage. Conversely, if the output voltage rises above 1.25 volts, the regulator decreases the output voltage.
Pass Transistor: The regulator uses a pass transistor to control the flow of current from the input to the output. This transistor acts as a variable resistor, adjusting its resistance to maintain a constant output voltage.
Voltage Divider: The external resistor network connected to the adjustment pin consists of two resistors: R1 and R2. R1 is connected between the output pin and the adjustment pin, while R2 is connected between the adjustment pin and ground. By varying the ratio of R1 to R2, the output voltage can be adjusted according to the following formula: Vout=1.25×(1+R1/R2)
By choosing appropriate values for R1 and R2, the output voltage can be adjusted to any value within the range supported by the regulator.
In summary, a 12V adjustable voltage regulator works by comparing the output voltage with a reference voltage and adjusting the pass transistor's resistance to maintain a constant output voltage. By varying the ratio of two external resistors, the output voltage can be adjusted to the desired level.
How Do You Wire a 12V Adjustable Voltage Regulator?
Wiring a 12V adjustable voltage regulator, such as the LM317, is relatively straightforward. Here's a step-by-step guide:
Components Needed:
1.12V input power source (e.g., battery, DC power supply)
2.LM317 voltage regulator IC
3. Input and output capacitors (optional but recommended)
4. Resistors for voltage adjustment (R1 and R2)
5. Breadboard or PCB (Printed Circuit Board)
6. Connecting wires
Procedure:
1. Identify Pins: Familiarize yourself with the pinout of the LM317 voltage regulator. The pins are typically labeled as follows:
● Input pin (Vin): Connects to the positive terminal of the input power source (12V).
● Output pin (Vout): Provides the regulated output voltage.
● Adjustment pin (Adj): Connects to the resistor network for voltage adjustment.
2. Connect Input Capacitor (Optional): Connect a capacitor (typically electrolytic, around 1μF to 10μF) between the input pin (Vin) and ground. This capacitor helps to stabilize the input voltage and reduce noise.
3. Wire Voltage Adjustment Resistors (R1 and R2):
● Connect one end of resistor R1 (typically a 220Ω resistor) to the output pin (Vout) of the LM317.
● Connect the other end of R1 to the adjustment pin (Adj).
● Connect the other end of resistor R2 (its value will determine the output voltage) to the adjustment pin (Adj).
● Connect the other end of R2 to the ground (GND).
4. Connect Output Capacitor (Optional): Connect a capacitor (typically electrolytic, around 1μF to 100μF) between the output pin (Vout) and ground. This capacitor helps to stabilize the output voltage and reduce noise.
5. Connect Load: Connect your load (the device you want to power) to the output pin (Vout) of the LM317.
6. Connect Input Power Source: Connect the positive terminal of your 12V input power source to the input pin (Vin) of the LM317. Connect the negative terminal of the input power source to the ground (GND).
7. Double-check Connections: Ensure all connections are correct and secure.
8. Power Up: Apply power to the input of the voltage regulator.
9. Adjust Output Voltage (Optional): If you want to adjust the output voltage, calculate the values of R1 and R2 using the LM317's voltage formula, then adjust the resistor values accordingly.
10. Test: Verify that the output voltage is at the desired level and that your load is receiving stable power.
What Are the 12V Adjustable Voltage Regulator's Pros and Cons?
Pros
Flexibility: The adjustable feature allows the output voltage to be set to different levels within a certain range, providing flexibility for various applications.
Precise Output Voltage Control: With external resistor networks, precise output voltages can be achieved, tailored to the specific requirements of the application.
Stability: Adjustable voltage regulators provide a stable output voltage regardless of changes in input voltage or load conditions, ensuring consistent power delivery to connected devices.
Low Ripple: Many adjustable voltage regulators offer low output ripple and noise, making them suitable for powering sensitive electronic components.
Ease of Use: Setting the output voltage is relatively simple by adjusting resistor values, making them easy to use in various circuits and projects.
Versatility: Suitable for a wide range of applications, including power supplies, battery chargers, LED drivers, and audio amplifiers.
Cost-Effective: Adjustable voltage regulators are often more cost-effective compared to fixed voltage regulators, especially when multiple output voltages are required.
Cons
Higher Complexity: Adjustable voltage regulators may be more complex to design and implement compared to fixed voltage regulators, requiring additional components such as resistors for voltage adjustment.
External Components Required: They typically require external resistors to set the desired output voltage, increasing component count and board space.
Lower Efficiency: Adjustable voltage regulators may have lower efficiency compared to fixed regulators, especially when the output voltage is significantly lower than the input voltage. This is because the excess voltage is dissipated as heat.
Heatsinking Requirements: In high current applications or when there is a large voltage drop, adjustable regulators may require heatsinking to dissipate heat effectively.
Limited Current and Voltage Range: Some adjustable voltage regulators may have limitations on the maximum output current and input-output voltage differential, restricting their use in certain high-power or high-voltage applications.
Noise Sensitivity: Due to their feedback control mechanism, adjustable voltage regulators may be more sensitive to noise and fluctuations in the input voltage, requiring additional filtering components in noisy environments.
How Do You Test a 12V Adjustable Voltage Regulator?
To test a 12V adjustable voltage regulator like the LM317, follow these steps:
What You Need:
● Power supply (15V or higher)
● Multimeter
● Load resistor or electronic device
Procedure:
1. Setup Circuit:
● Connect Vin to the power supply's positive terminal.
● Connect the power supply's negative terminal to the ground (GND).
● Attach a load to Vout.
● Ensure all connections are secure.
2. Measure Input Voltage:
● Use the multimeter to check Vin against the ground.
● Ensure Vin is within 3V of the desired output.
3. Adjust Output Voltage (Optional):
● Calculate R1 and R2 for the desired voltage.
● Connect them to Adj and GND.
4. Measure Output Voltage:
● Use the multimeter to measure Vout.
● Confirm it matches the desired voltage.
5. Check Load Regulation:
● Connect a load.
● Measure Vout again.
● Ensure it stays stable within tolerance.
6. Check Ripple and Noise (Optional):
● Use an oscilloscope to check for noise.
● Ensure it's within acceptable limits.
7. Check Thermal Performance (Optional):
● Monitor temperature under load.
● Ensure it stays within limits.
8. Verify Protection Features (Optional):
● Test any built-in protections.
● Ensure they work correctly.
9. Final Checks:
● Double-check all connections and measurements.
● Record results for reference.
What are the types of 12V adjustable voltage regulators?
There are several types of 12V adjustable voltage regulators, each with its characteristics and applications. Some common types include:
LM317:
The LM317 is a widely used linear adjustable voltage regulator capable of delivering up to 1.5 amps of output current.
It operates by continuously adjusting its internal resistance to maintain a constant output voltage.
The LM317 is versatile and commonly used in low to medium power applications, such as power supplies, battery chargers, and audio amplifiers.
LM338:
The LM338 is another linear adjustable voltage regulator similar to the LM317 but capable of higher output currents, up to 5 amps.
It offers improved thermal regulation and can handle higher power dissipation.
The LM338 is suitable for applications requiring higher current output, such as LED drivers, motor control circuits, and bench power supplies.
LM350:
The LM350 is a further enhancement of the LM317 and LM338, offering even higher output currents, up to 3 amps.
It provides improved thermal regulation and lower dropout voltage, making it suitable for high-current applications with tighter voltage regulation requirements.
LM2940:
The LM2940 is a low dropout (LDO) adjustable voltage regulator capable of delivering up to 1 amp of output current.
It offers a lower dropout voltage compared to traditional linear regulators, making it suitable for applications where the input voltage is close to the desired output voltage.
The LM2940 is commonly used in battery-powered devices, automotive electronics, and portable electronic devices.
LM2576:
The LM2576 is a switching adjustable voltage regulator capable of delivering up to 3 amps of output current.
It operates by switching an internal transistor on and off to regulate the output voltage efficiently.
The LM2576 is highly efficient and suitable for applications where power dissipation needs to be minimized, such as in battery chargers, LED drivers, and DC-DC converters.
These are just a few examples of the types of 12V adjustable voltage regulators available. Each type has its specifications, advantages, and limitations, allowing designers to choose the most suitable regulator for their specific application requirements.
Conclusion
In summary, 12V adjustable voltage regulators provide a convenient and reliable solution for maintaining a stable 12V output voltage, while providing the flexibility to adjust the voltage level as needed for different applications. Setting up an adjustable voltage regulator requires some technical know-how, but it is not difficult if you understand and follow the steps outlined in this article. Once the regulator is set up and working properly, it can be used to regulate the voltage of various circuits, allowing you to better control the power output of your system. In this way, you can maximize the efficiency and performance of your system and create a more reliable and cost-effective power supply.


Shenzhen,Futian District, No.3018 Shennan Avenue,Bank of Communications Building,20F.
+852-30533019
dasenic@dasenic.com


Copyright © Dasenic All Rights Reserved. Guangdong ICP No.2022048691


